
I’ve begun my full-time student teaching at none other than Cass Technical High School, my alma mater. At first I thought I would be in the Art Composition classroom, meaning I would be working mostly with freshmen in 2D. But I ended up with the lead art teacher, who teaches Fashion, Jewelry, Textiles, and Studio Art 3D, primarily to the upperclassmen. I have zero training in Jewelry and Textiles, and only informal “training” in Fashion (think “How to Draw” book for little kids that I went through in elementary school). So I was a bit concerned about how this placement would go.
Luckily, my mentor teacher was all for having me be more “student” than “student-teacher” in the Jewelry and Textiles classes. I’ll introduce my first experiences with textiles in a later post. Here, I’ll talk about my first-ever jewelry piece.
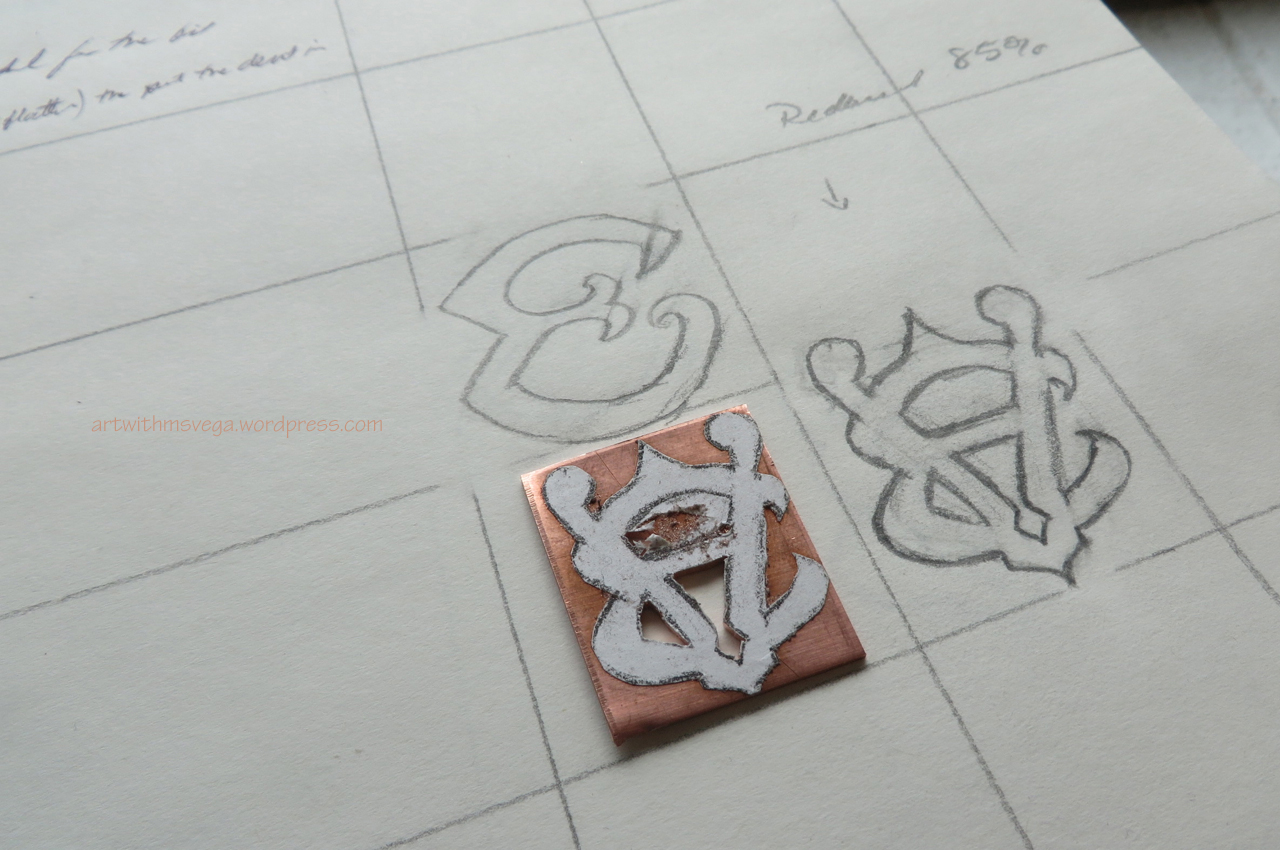
The first assignment students had was to create a monogram in copper. They had The Encyclopedia of Monograms compiled by Leonard G. Lee to use as reference. I looked through the options for all possible combinations of my initials, but the ones I liked were quite ornate and I worried I might not be able to cut them out in metal very well. Ultimately, I borrowed elements from other monograms to create my own “EV” with a hint of an “A”—a design that would be appropriate for my first attempt at small-scale metalwork.
After my mentor showed me how to use a punch to mark where to drill to create the negative spaces, a student showed me how to use the drill press. I’ve used one for woodworking before so this part at least felt a bit familiar. Another student showed me how to place the blade into the jeweler’s saw and how to cut the metal. All was going well until I had to turn a corner. I looked in The Complete Metalsmith by Tim McCreight but didn’t find an answer. My ungraceful workaround was to simply make multiple cuts within the space. One broken saw blade later, I got a demo from my mentor, and described the proper technique thus in my sketchbook:
TURNING THE BLADE W/IN A SPACE: This was the hardest thing to intuit. When working w/ wood, I’ve just drilled 2 holes w/in the space. But there is a way to turn the blade instead. Similar to “filing w/ the saw,” the main thing is to stay in the channel, turning the piece veeeeery slowly so as to slowly widen the channel. In a way, it’s not really a turn at all. It’s more like a せんす opening.
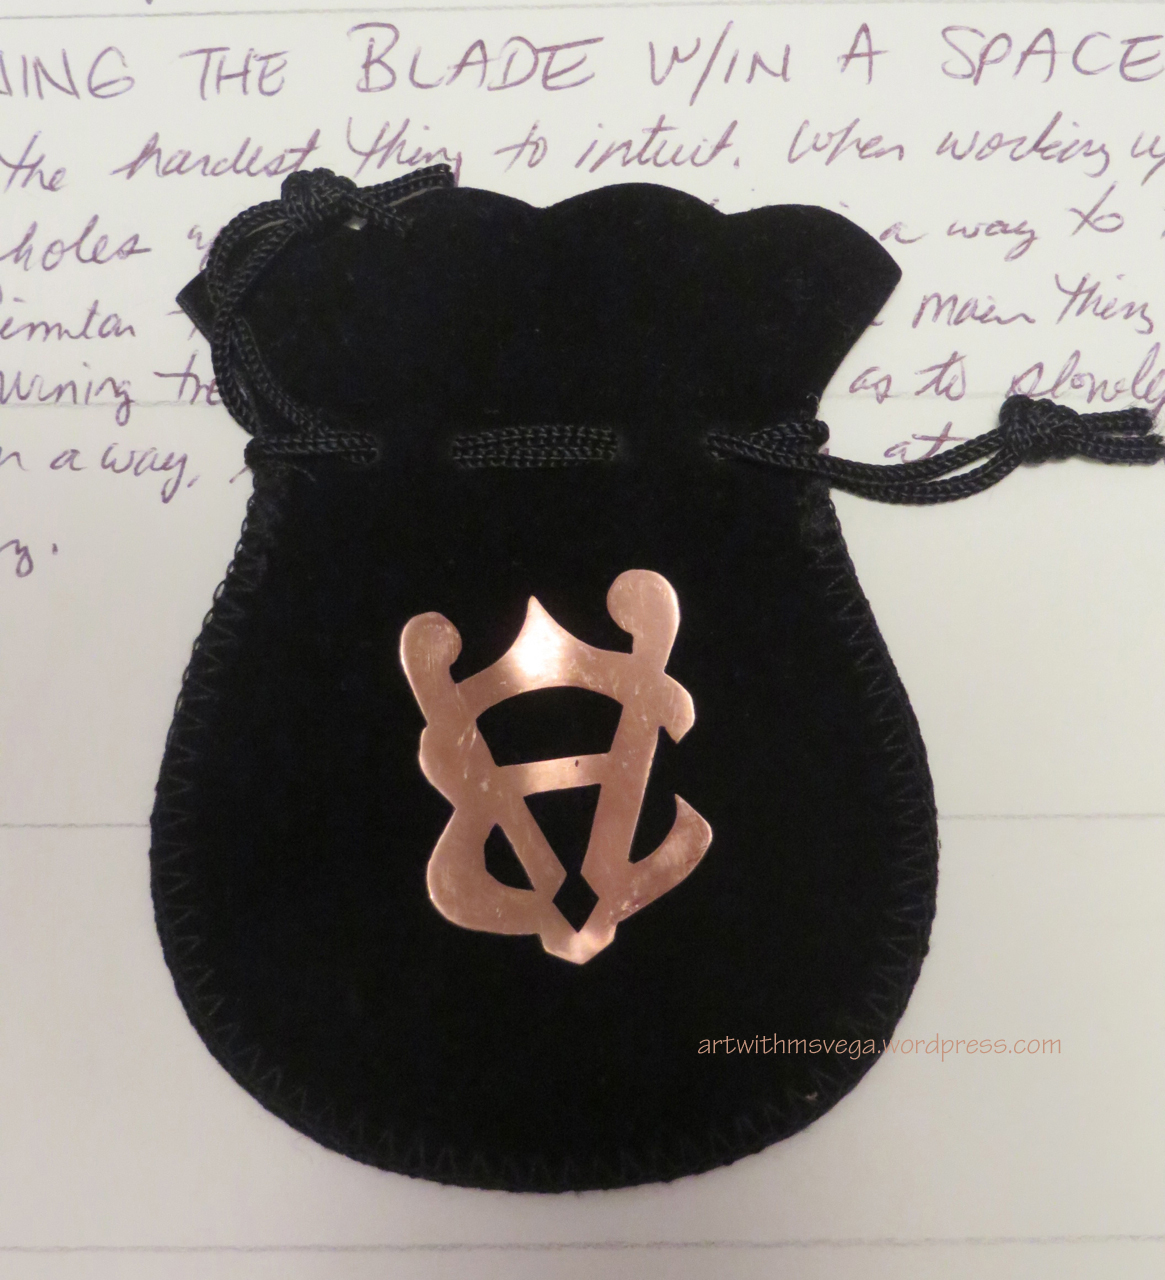
A せんす (sensu) is a folding fan. Once I had this image in mind, I was able to cut out all the remaining negative spaces. I broke two more saw blades getting everything cut, but that’s not too bad for an amateur, is it? (Ahaha)
The next step was filing and sanding. This was also something I was quite familiar with through woodwork. I had sanded some of my pieces down until they were soft enough to want to rest your face on! I had also restored my car’s headlight lenses relatively recently, so I knew that, counterintuitive thought it seemed, the way to get something nice and shiny was to first scratch it up.
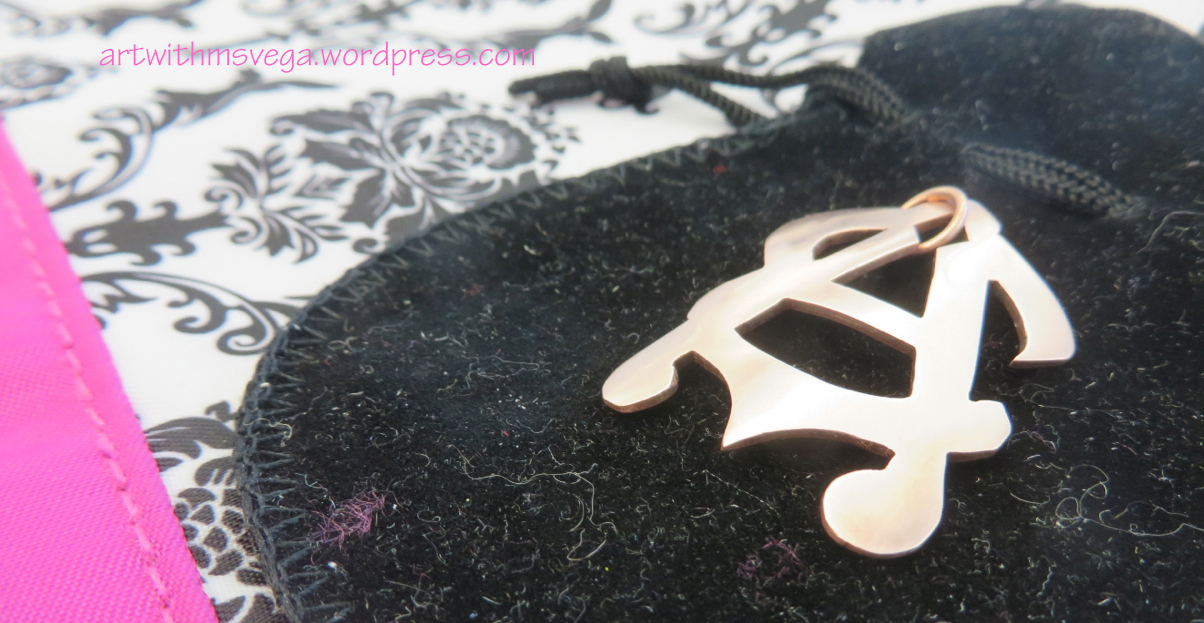
As I sanded the piece, I noticed that it looked better upside-down. While I prefer to go as “EV” if I’m only using one last name, the piece looked far more dynamic when flipped and turned, making it read more as “EA.” This orientation also had the added benefit of putting a small opening near the top—a prime spot for a jump ring.

I haven’t done any soldering yet, so one of the more advanced students soldered the jump ring shut for me. It made me think about all the times I had used pliers to close a jump ring that had opened up on a phone strap, key chain, or other such accessory. How nice to know that wouldn’t be a problem with this piece!
I added one last feature to this piece by curving it by hand against the horn of an anvil. I hadn’t wanted to add texture, so this gave dimension to an otherwise flat piece.
Once that was done, I learned how to polish it on the buffing machine. But doing so revealed some deep scratches I hadn’t seen before. I went back to a medium grit sandpaper to get them out, then back up to fine, then went back to the machine but…I couldn’t get an even polish, and in any case, I had once again revealed other surface imperfections, albeit small ones. My mentor suggested I use steel wool to create a satin finish. I did so, and am mostly satisfied with the result. Some spots always look strange, but I think it might be the oil from my fingers. In any case, I think it isn’t bad for my first attempt at metal jewelry-making, and it probably makes the students feel more confident to know that they were the ones teaching the teacher!